Raspberry Pi Network Monitor in AWS
Raspberry Pi Network Monitor
Following on from the previous post, FMADIO-MINI is an ultra low cost but effective raspberry pi packet capture device suitable for capturing 100Mbps to sub-1Gbps links.
That’s fantastic you have all this PCAP data, but who cares? Not a lot of people, to be perfectly honest, thus enter “PCAP2JSON”.
PCAP2JSON is a fully developed and Production, proven to sustain 50Gbps network monitoring system that takes PCAP as an input and outputs half duplex snapshot flows in JSON format. Think of it as a bit like the following:
▶ Start by taking a raw PCAP and converting it into unique half duplex flows. We do more than just 5-tuple and include up to 3 VLAN tags, 3 MPLS tags, GRE tunnels, and more. Think of it as a unique one-directional flow of data.
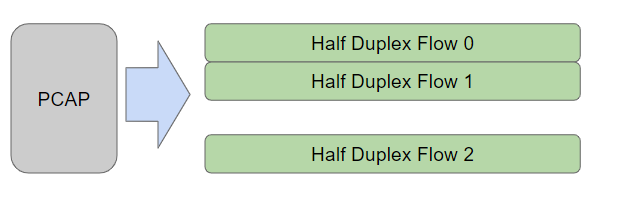
PCAP convert to half duplex flows
▶ Next, we slice this flow into 1-second timeslots. As anyone who has used traditional “Netflow” data knows, it’s great for monitoring who’s talking to who, but it’s completely useless for monitoring Network Bandwidth. And Network Packet Rates, e.g. traditional Netflow data, cannot be used for fine granularity performance monitoring, such as asking how much bandwidth VLAN X is consuming during a peek time slot.
▶ Thus we cut this flow data so it can be used in a time series database. This allows you to calculate bandwidth data rates and packet rates with your favorite monitoring tools.
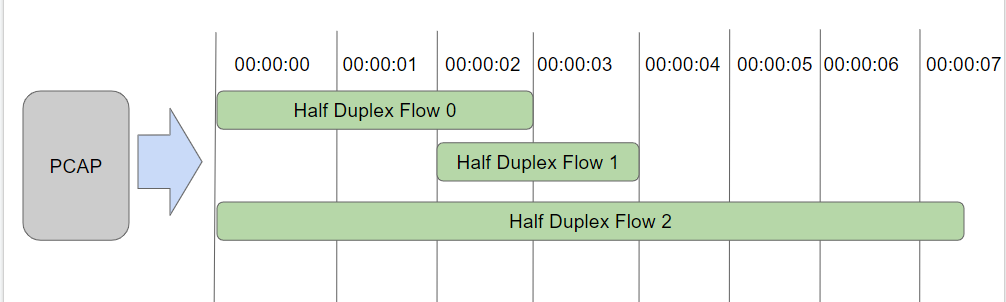
PCAP Network Monitoring Sampling at 1 Seccond
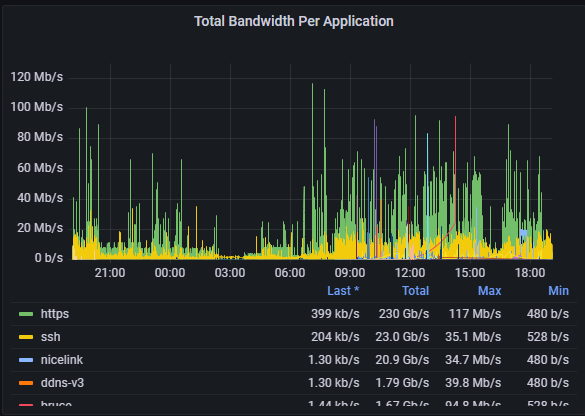
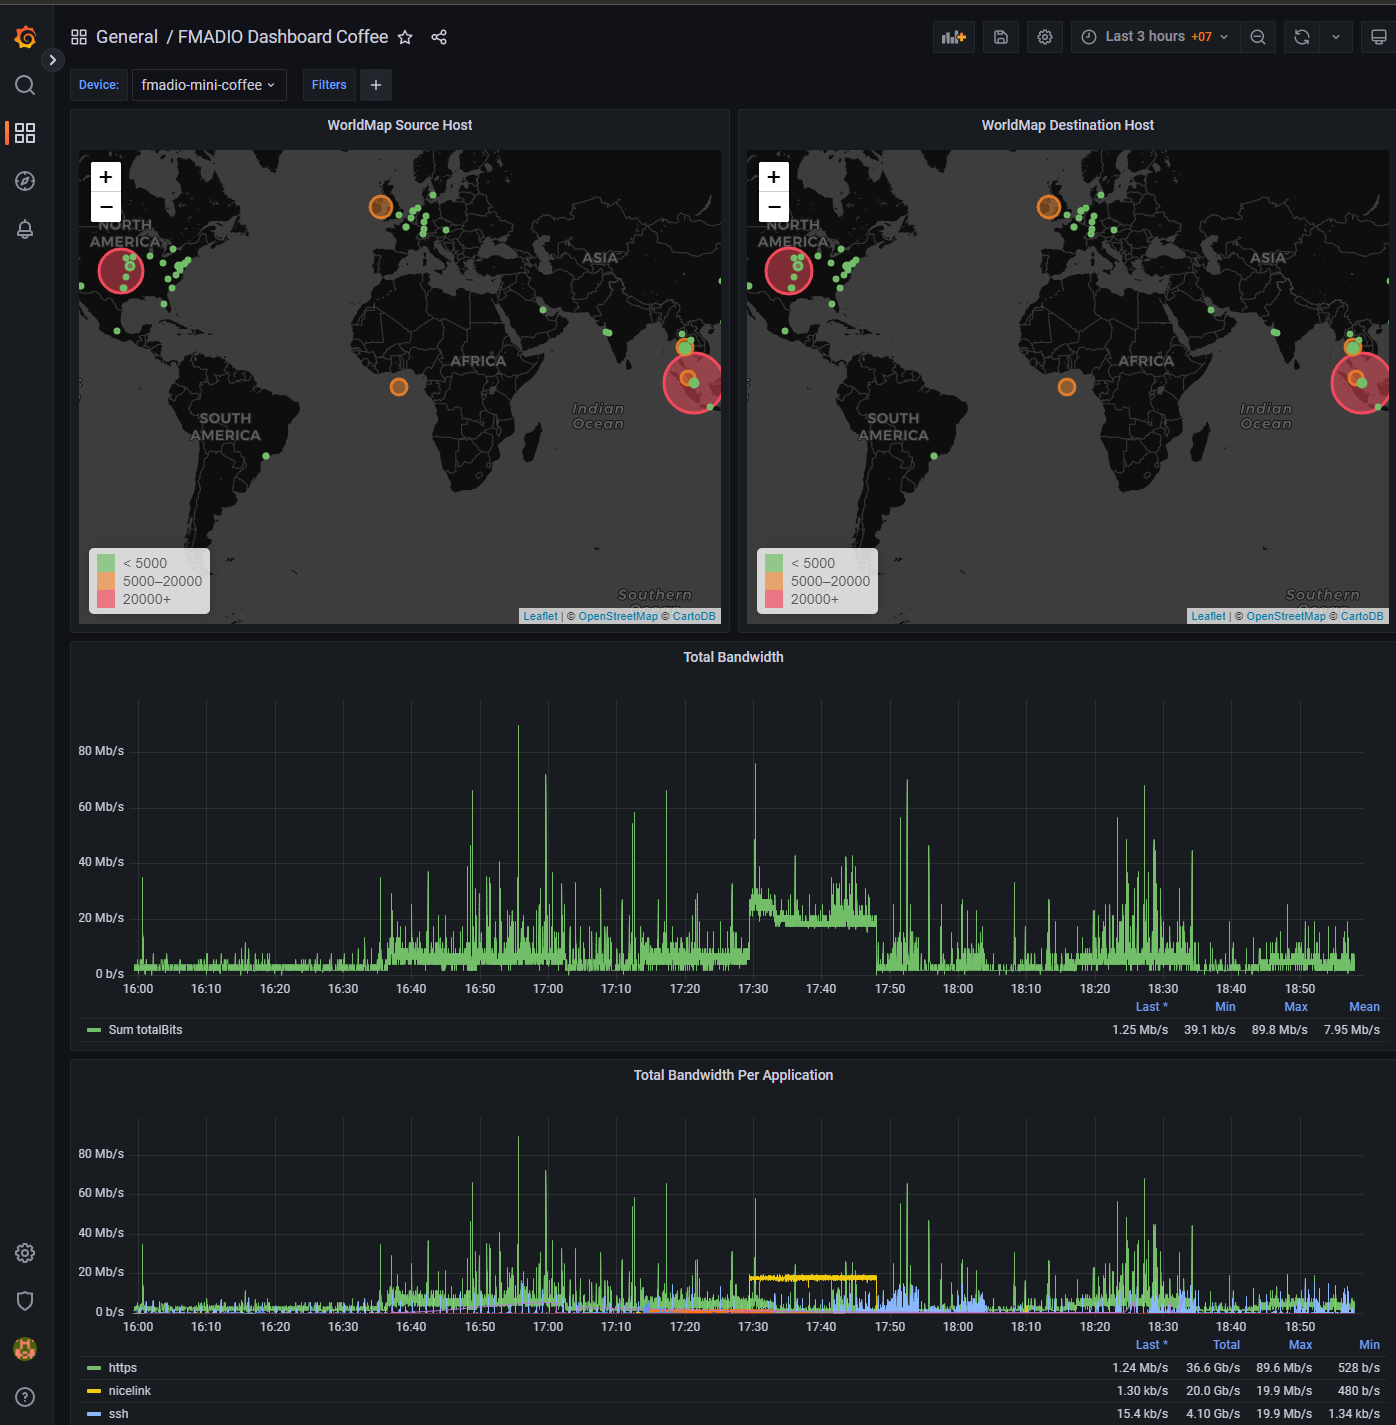
▶ The end result is a single JSON document per Half Duplex Flow per 1-second snapshot, which can be pushed into Elasticsearch and graphed as a time series using Grafana. Below is a screenshot of a Raspberry Pi device capturing 24/7 and running PCAP2JSON, pushing the JSON documents to an AWS Elasticsearch/Grafana instance.
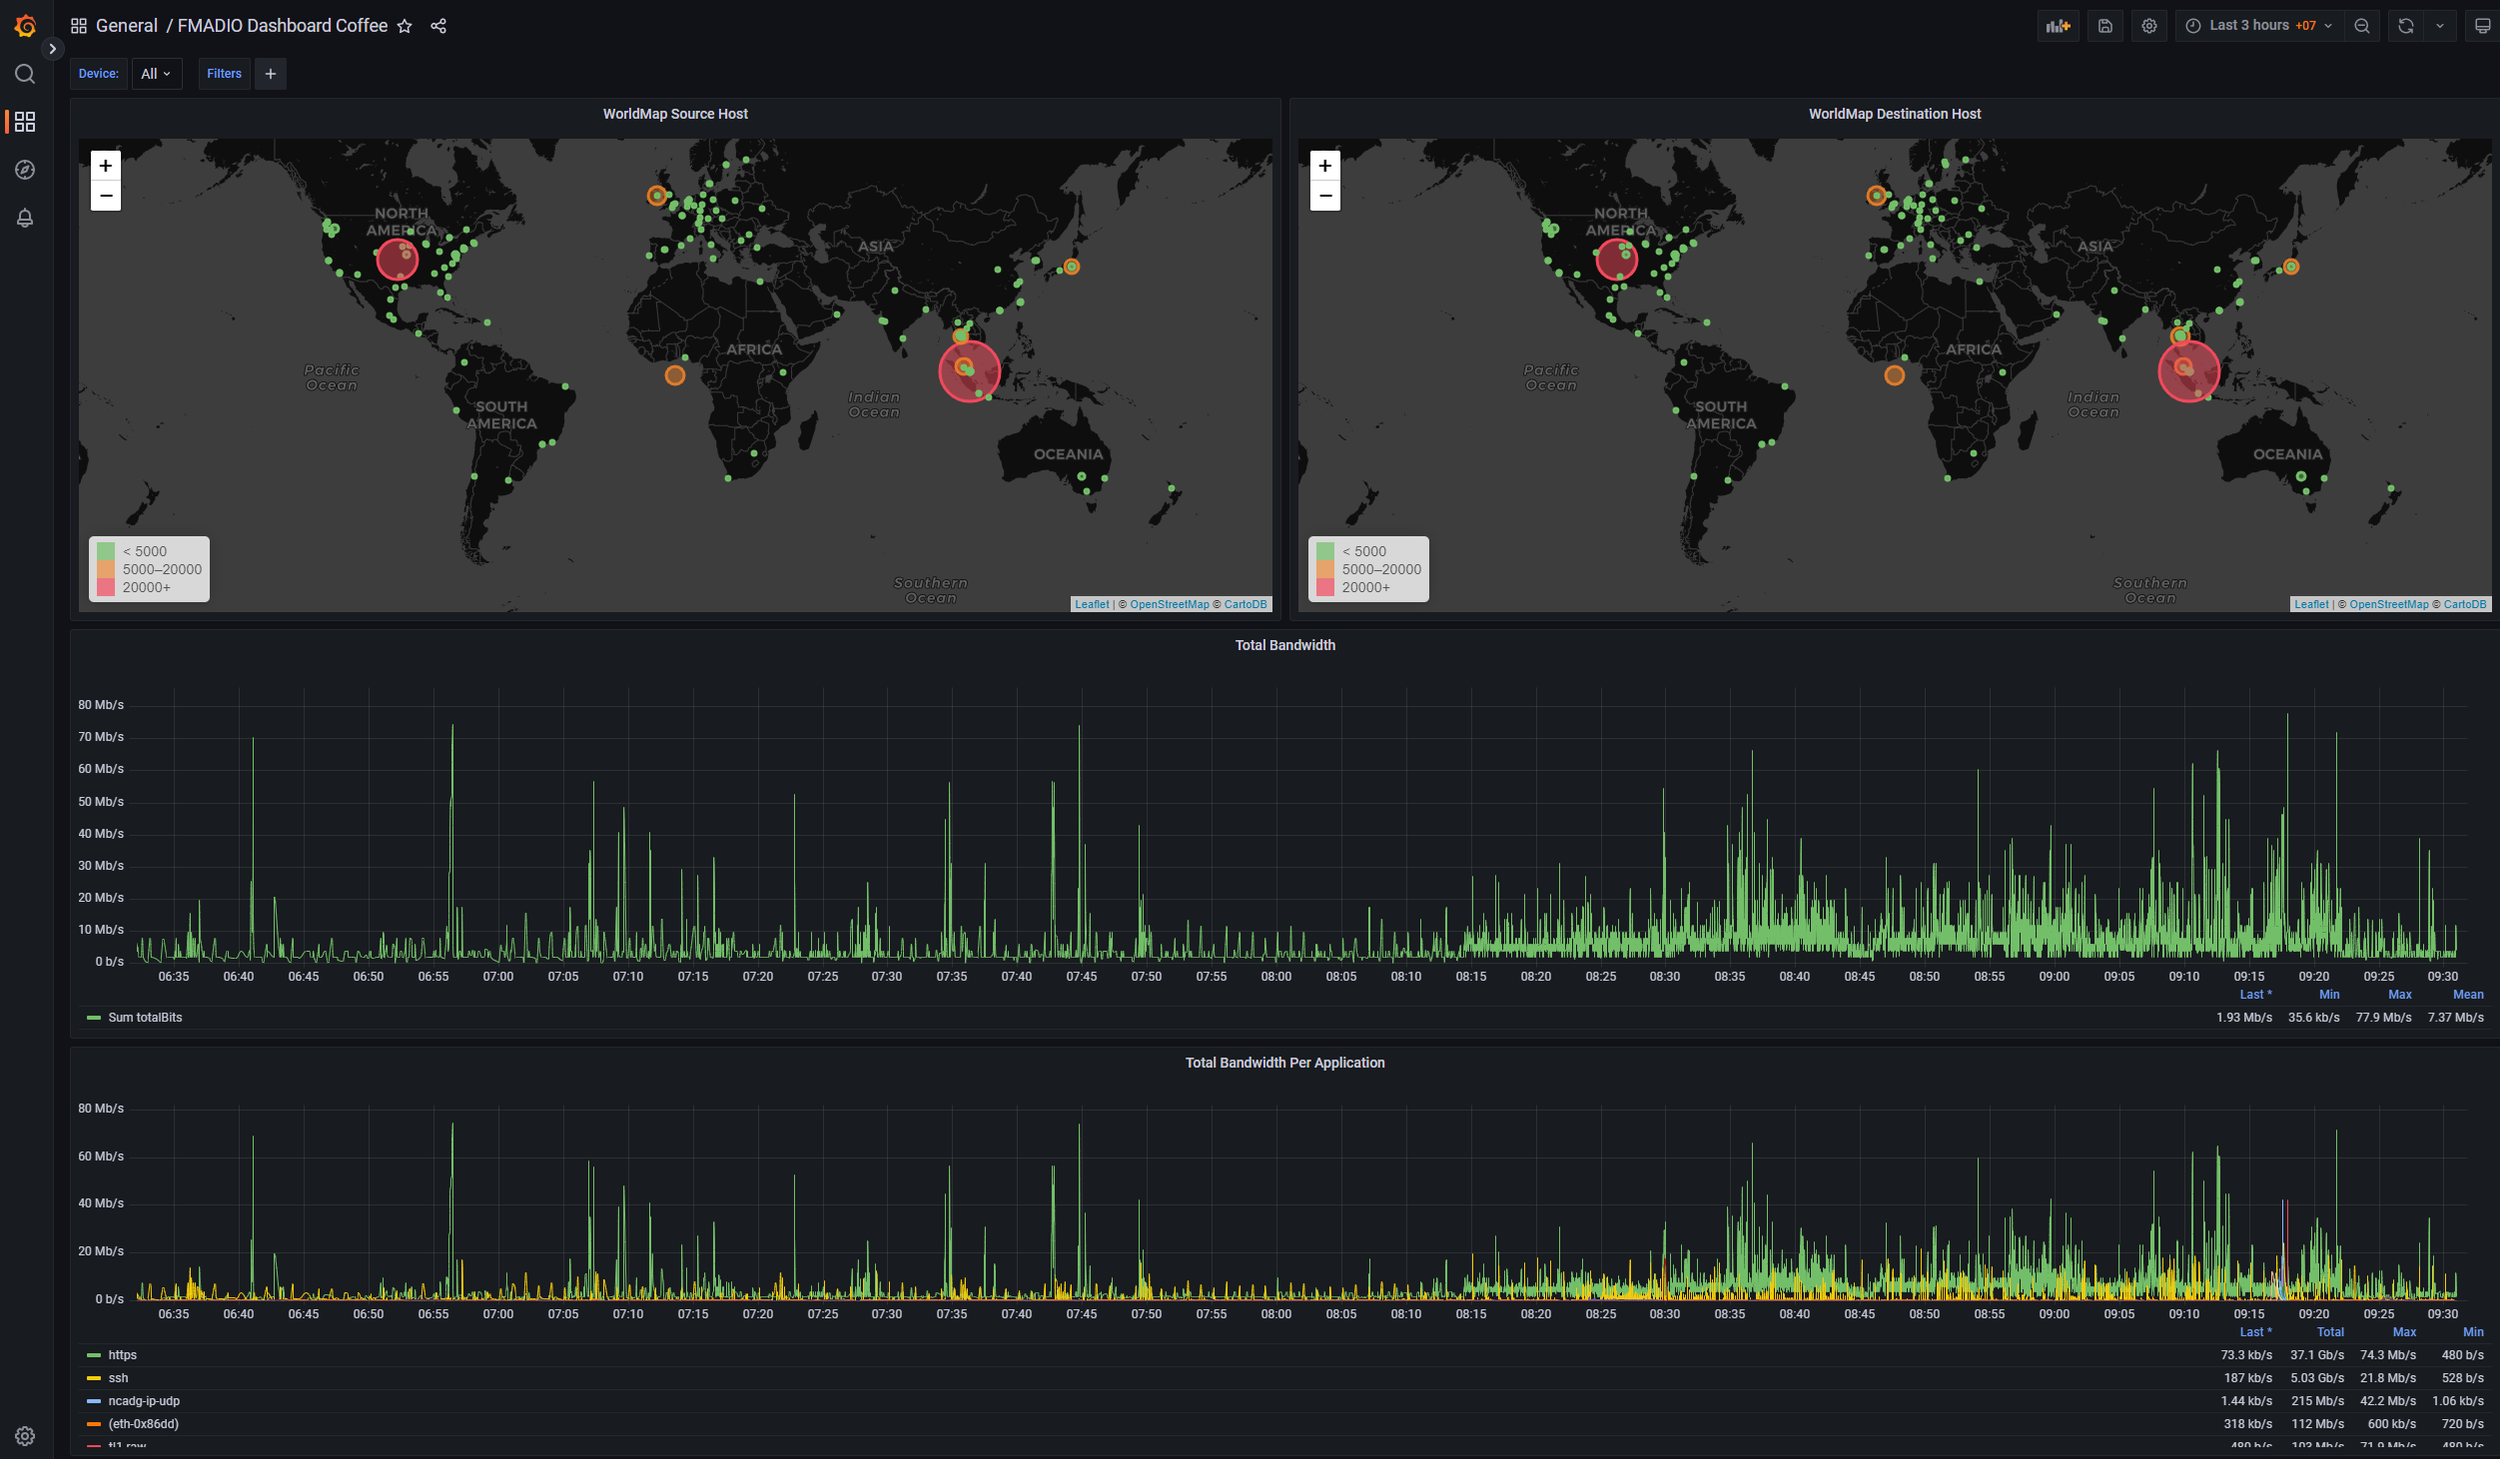
FMADIO MINI + PCAP2JSON with AWS Elasticsearch and Grafana
Pretty cool. So how does that work?
It’s really simple. We use an SSH tunnel from the Raspberry PI Packet Capture system to our AWS Elasticsearch instance running in Singapore. This tunnels SYSLOG and Network Flow JSON data from anywhere into a centralized AWS Elasticsearch instance (shown below).
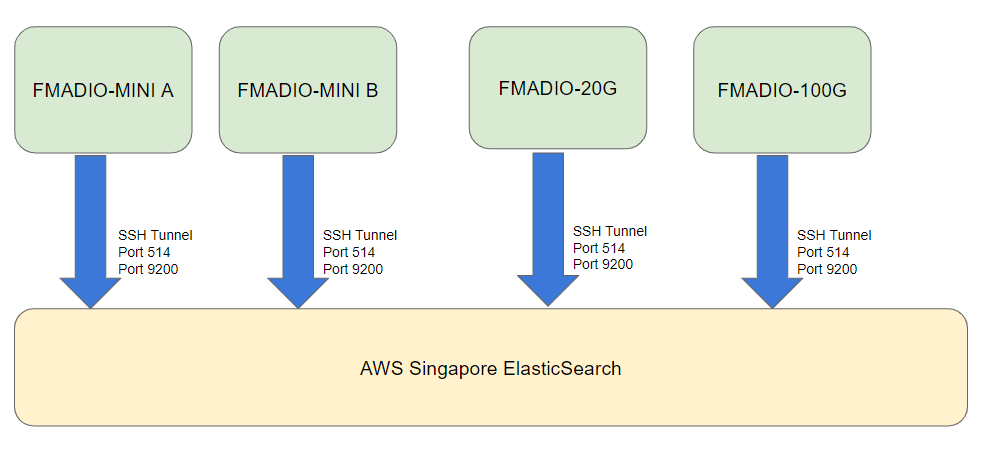
FMADIO Centralized Network Monitoring
How do I set that up?
It’s super easy. FMADIO has published a FREE Amazon Web Services AMI that you can spin up with a few clicks of the mouse. It runs using an ARM64 instance that has dedicated local SSD storage. This means it’s also cheap and has no additional storage costs. We have been running this internally for a few months now. It easily keeps 7+ days of data with half a dozen FMADIO devices pushing data to it. The total is only $30 USD / month in AWS EC2 charges (no additional costs)
The current AMI is named FMADIO-ES-20220720.
…
If your location is missing drop us a message, and we can add it to the list.
One thing to be careful about is ensuring a public IP is auto-assigned to the instance as shown below. Otherwise, your FMADIO capture device won’t be able to connect to it.

AWS FMADIO AMI Centralized Network Monitoring Image
default passwords for the Kibana are elastic:fmad-secret and Grafana is admin:fmad-secret.
FMADIO Raspberry Pi Packet Capture Setup
All FMADIO devices have the “autossh” utility installed. With a few hooks, it’s easy to have it work automatically.
1) Add the FMADIO Packet Capture sniffers SSH key to the AWS authorized_keys as follows.

Get the public RSA key off the device
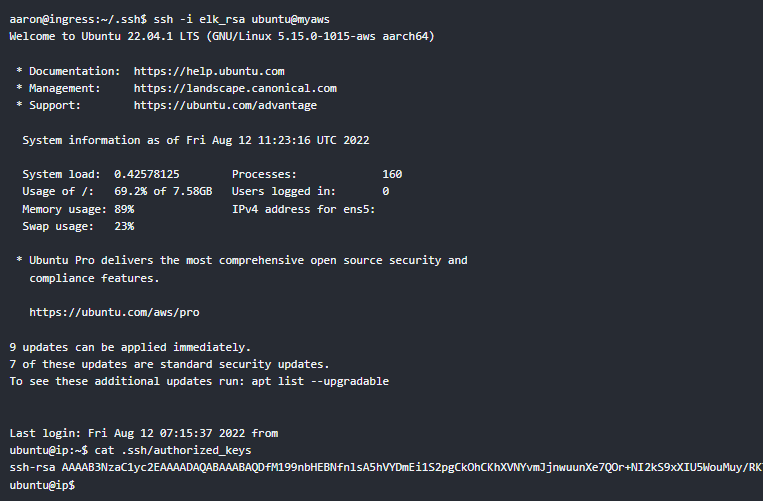
Then append to the authorized_keys file on the AMI
2) Confirm you can SSH from the FMADIO Packet Capture system into the AMI instance without a password using SSH keys only
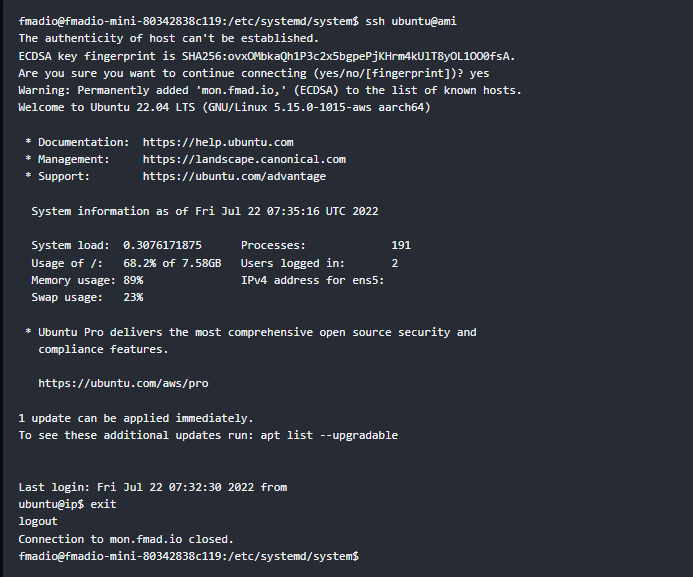
SSH to the newly created AWS FMADIO Elastic Grafana Image
If it times out check the AWS Firewall settings are correct
3) Set the AWS server IP address for the SSH tunnels
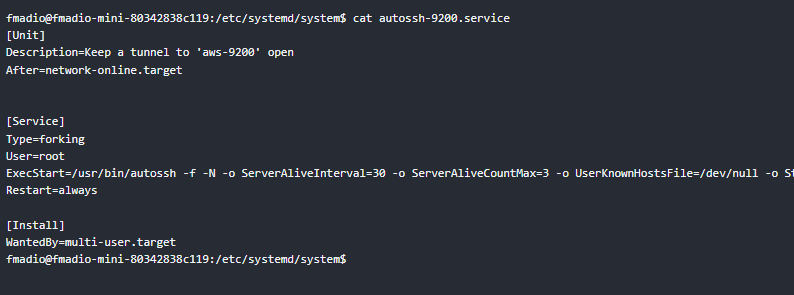
File is located
/etc/systemd/autossh-9200.service
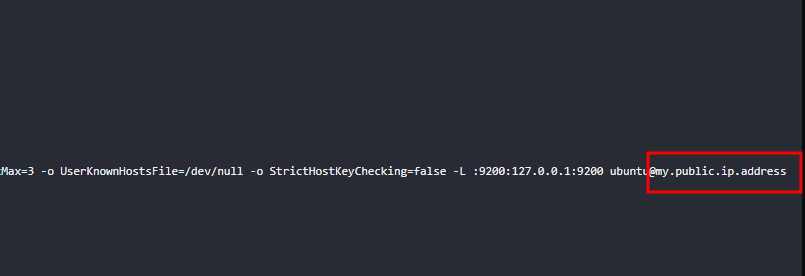
At the very end of the autossh command change the “my.public.ip” to the public IP address of the AWS Server
4) Repeat the above Step 3) for the autossh-514.service file enabling SYSLOG data to feed into the centralized monitoring system.
5) Reboot the FMADIO device
6) Confirm SSH Tunnel is active by issuing an ES request using CURL
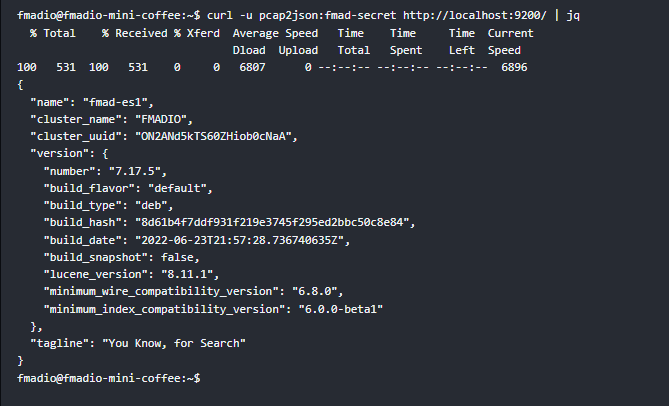
Confirm ES is connected
7) Sit back and enjoy
If it’s all set up and working, wait for data to flow into the FMADIO Raspberry PI Packet Capture system and flow into your managed AWS Network Monitoring system!
Grafana AMI Public IP Address @ port 3000. Credentials admin:fmad-secret
Kibana AMI Public IP Address @ port 5601. Credentials elasic:fmad-secret
Network Monitor at Sustained 50Gbps
The above is for our low-cost packet capture Raspberry PI FMADIO-MINI image, which clearly can’t do 50Gbps worth of traffic. However, FMADIO rack mount Packet Capture systems can. We have proven sustained 50Gbps bursting to 90Gbps running in production environments using exactly the same setup using scaled-up hardware to accommodate the increased bandwidth.
As always contact us with any problems or questions.